Stay Informed
Popular Articles
- Hiatal Hernia: Hidden Cause of Chronic Illness
- Small Intestinal Bacterial Overgrowth (SIBO)
- Applied Lymphology: Unlocking the Secret to Pain Relief
- An Introduction to Constitutional Iridology
- The Low Down on Liver Detoxification
- An Energetic and Emotional Approach to Cancer
- Fat Facts
- Marrow in the Bones
- Blood Type and Nutrition
- Cardiac Herbs: Beyond Hawthorn
Quick Search
The School of Modern Herbal Medicine


Kale Chips
- 6/11/2014
- Categorized in: Healthy Recipes
 One of the best things we can do for our health is to eat more dark, green leafy vegetables. But how do you get kids to eat them, let alone most adults? Making kale chips is one way.
Kale is a powerhouse of nutrition. It is very high in vitamins K, A and C, as well as significant amounts of various B-vitamins. It’s a good source of manganese, copper, calcium, potassium, iron and magnesium, too. Kale is loaded with antioxidants, which help to reduce inflammation and cellular damage. It’s also a cruciferous vegetable, which means that like other cruciferous vegetables it contains compounds like indole-3 carbinol that help the liver break down toxic chemicals, giving it cancer preventing properties.
Making raw kale chips preserves all of these great nutritional properties and turns the kale into healthy snack that can replace potato and corn chips.
The first kale chips I made were quite simple. I mixed olive oil with lemon juice and some spices (like garlic, salt, black pepper and chili flakes) using the blender and then tossed the leaves in the mixture as if you were tossing a salad. I then baked them in the over on cookie sheets. You have to be really careful doing this, however, as there is a fine line between crisping up the kale chips and burning them.
I now make them in the food dehydrator, which means they are being crisped at lower temperatures. This preserves nutrients and prevents them from burning. People I share them with rave about how good they are, too.
So, here’s my recipe:
- 2 cups cashews
- 1 cup Cultured whey (optional)
- 2 medium bunches of kale (preferably organic)
- 1/2 to 1 medium onion (optional)
- 1/2 to 1 medium bell pepper (optional)
- 1/4 cup nutritional yeast (optional)
- 1 teaspoon natural salt
- 1/8 cup olive oil
- 1/8 cup raw apple cider vinegar
- Spices (see below for suggestions)
Start by putting 2 cups of cashews into a container (I use a glass mason jar). Cover them with water or whey. (I use Suero Gold, a cultured whey product from Beyond Organic to soak my nuts, that way I’m adding probiotics to my kale chips.) Put the container into the refrigerator for at least two hours. (I often soak mine overnight.)
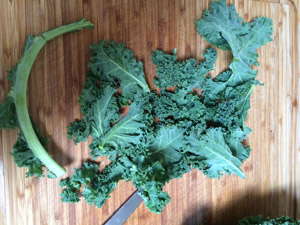
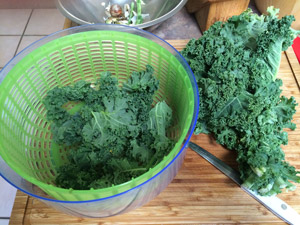
 Cut the central stems from 2 bunches of kale leaves. This is depicted in the first image on this page. Then cut or tear large leaves into smaller pieces (2 to 4 inches in size is good). Wash kale thoroughly and allow leaves to dry a little. I use a salad spinner as pictured on the right. Even though I use organic kale I still wash them in water with a couple of drops of Sunshine Concentrate, then rinse them. If they are a little wilted, I let them soak for 15-20 minutes to plump up, too.
After rinsing, I spin my kale dry using a salad spinner and place it in a large bowel.
I then take the soaked nuts and the liquid they were soaked in and put that into the blender, then add the onion, bell pepper and nutritional yeast. You can omit any of these ingredients if you don’t like them. One medium onion gives a strong onion flavor, so if you want less onion flavor, using only a half an onion. The nutritional yeast adds a lot of b-vitamins and a cheesy flavor.
Finally, I add the olive oil and apple cider vinegar, along with the salt and some spices. Here are some options:
- 1/2 teaspoon freshly ground black pepper (if you want a black pepper flavor)
- 1/2 teaspoon turmeric (gives chips an orange color, which makes them look more cheesy)
- 1-2 chopped garlic cloves
- 1/2 to 1 teaspoon dried red pepper flakes or 1/2 teaspoon capsicum or 1 small hot chili pepper (for heat)
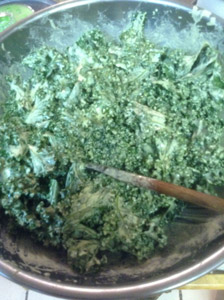
 After mixing in the spices and blending the nuts, vegetables, olive oil, vinegar and spices together until smooth, I pour this mixture over the kale pieces and stir until all the leaves are coated with the mixture as shown in the picture on the left.
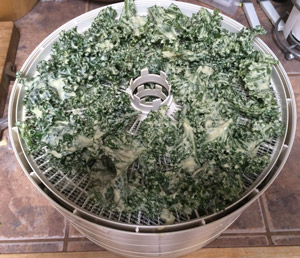
I then spray the trays for my food dehydrator with non-cook spray and place the coated pieces of kale on the trays. I pack the leaves on so there aren’t a lot of spaces between them as they shrink as they dry. See last photo on page.
I set the trays on the dehydrator and dehydrate them at the highest temperature (135 degrees on my dehydrator) for 4-8 hours, until they are completely dry and crispy. I find that drying them at the higher temperature makes them taste better than drying them at lower temperatures. It gives them less of a “raw” taste (something that doesn't appeal to me) but you don't run the risk of burning them (as you do when you cook them in the oven). Also, the temperature is low enough to preserve most of the nutrients.
 Many variations can be made. A great website for more recipes for kale chips is http://nouveauraw.com. There are some amazing flavors of kale chips you can make using the recipes on that website, which can give you more ideas.
Enjoy.
If you'd like to see a demonstration on how to make kale chips, watch my presentation on how to make kale chips on the local TV show The New You.
